Glossaries |
  
|
Glossaries |
|
The glossaries are files which any estimate can tap into. They contain a user-defined collection of entries: up to 9,999 WBS items and as many minutes. The entries are viewed by the row number, description and reference values (the mark for the WBS items), but the other WBS/Minutes fields are stored as well.
Only one of both parts is visible at one time:
|
Nr |
Description |
Reference |
WBS part |
1 |
Electrical package |
A.1.i |
|
|
|
|
|
9999 |
|
|
Minutes part |
1 |
Circuit breaker |
Mge2012 |
|
|
|
|
|
9999 |
|
|
A default glossary shows and is retained as such until it is saved with a file name. This glossary can be opened from any estimate.
Tool: bar Home>Glossary
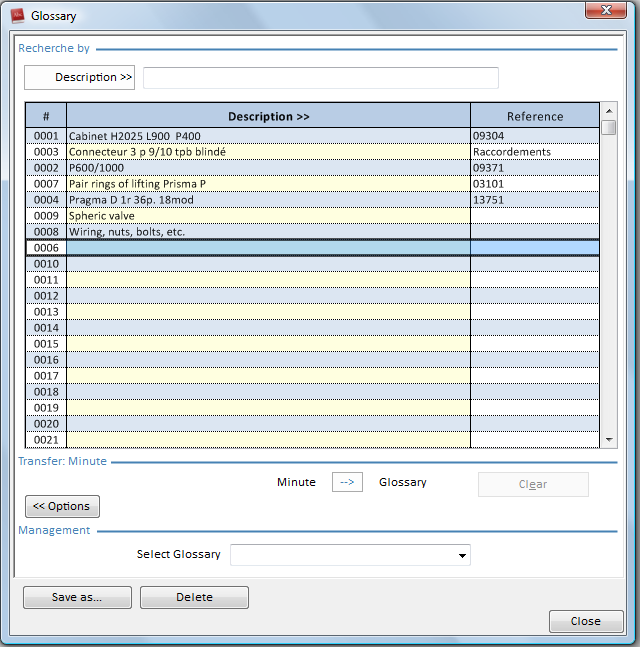
To show the latest selected glossary:
1.Select the first column of a node row or a chapter row (WBS), or select a minute. Refer to How to Make a Selection
2.Click the dialog box launcher ![]() on the right of 'Glossary' (F11); the glossary shows its WBS or Minutes part depending on the selection in step 1
on the right of 'Glossary' (F11); the glossary shows its WBS or Minutes part depending on the selection in step 1
3.To sort the entries according to the row number, the description or the reference, click the button with variable caption until the desired caption shows; as a result, the column header shows in bold.
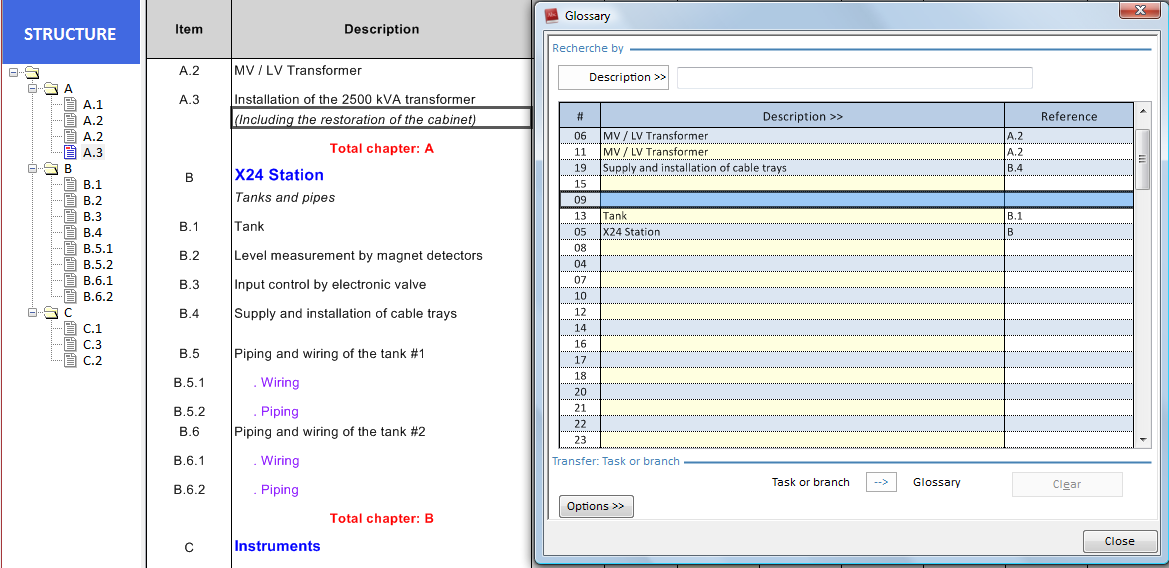
The arrow in the Transfer section points forward or backward whether the selected line is empty or not. For the WBS, the left label is respectively Task or branch / Same Level and Next Level.
Creating an Entry
To create an entry:
1.Select the source: the item of a node row or a chapter row (WBS), or a minute. Refer to How to Make a Selection
2.Click the dialog box launcher on the right of 'Glossary'; this opens a dialog box
3.Click three times an empty row in the sheet, or select an empty row and click ⭢ ; this adds the row to the current list.
Minute entry:
If, in the Minutes view, you click an empty row three times, this adds the parent row to the WBS list and closes the box; when you reopen the box, it shows the WBS part.
WBS entry:
To clear an entry, select it and click the Clear button.
NOTES
- Reference = Item
- Description: all the available translations are concatenated in this field
- If you select a nodeless row in the WBS, the node row above is selected
Transferring an Entry
The transfer to the WBS occurs in a new row below the current row (in the same chapter or another one as desired).
The transfer to the Minutes occurs by replacing the current row.
To transfer an entry to the WBS or the Minutes:
1.Select any cell in the target, which is a node row or a chapter row (WBS) or a minute. Refer to How to Make a Selection
2.Click the dialog box launcher on the right of 'Glossary'; this opens a dialog box
3.Select the desired entry; the arrow flips to ← if the need arises
4.In the Transfer section, click ← ; Minutes: this pastes the WHOLE entry (including the invisible fields) onto the target minute.
WBS: select Same Level or Next Level; this pastes the WHOLE entry (including the other fields) onto the WBS BELOW the selected task (with 'Next level', the chapter is split); click Numbering>Numbering the entire estimate or the current branch
NOTE If you select a nodeless row in the WBS, the stored entry is that of the task or chapter which the row belongs to.
Glossary Management
The glossaries are stored as files with extension .glo; to view the list, click the button Options and scroll the combo box 'Select Glossary'.
To create a glossary, click the Management>Save as button, select a folder. and enter a name. If you desire to empty it, select it in the combo box, and empty the inherited WBS part and Minutes part in turn.
To delete a glossary, click the Management>Delete button, and select the glossary. The entries are backed up in the default glossary.
To show a new glossary, select it, close the box and reopen it.
NOTE The glossaries cannot be edited directly. Storage folder: C:\Users\<user name>\AppData\Roaming\QDV\common (Vista; shortcut: %appdata%) or Documents & Settings\<user name>\Application Data\Temp\QDV\common (Windows XP).