Description |
  
|
Description |
|
Field Types
There are 3 types of fields exclusive of one another:
▪Hosting-row oriented fields: free fields edited in the minutes even when the minute refers to the Database of the Estimate (refer to the column Ignored from ... in How to Create Free Columns with Custom Behavior)
▪WBS oriented fields:
▪free fields whose Entry is allowed in WBS only (refer to How to Create Free Columns with Custom Behavior); to allow edition in the Minutes view, select WBS and Minutes
▪native WBS fields (their name starts with WBS_)
▪Minute oriented fields: all the other fields (when a minute refers to the Database of the Estimate, they are taken from the referral)
Return fields inherit from the list they depend on the behavior of the two first types. Return fields of the WBS Sheet are also WBS oriented.
Fields Manager
The Fields Manager features a workbook embedded in a resizeable dialog window. The workbook includes four sheets whose tab names are:
▪Free Fields (supplemented with special columns whose names are grayed)
▪Native Fields
▪Material sets of fields
▪Workforce sets of fields
▪Time frame fields.
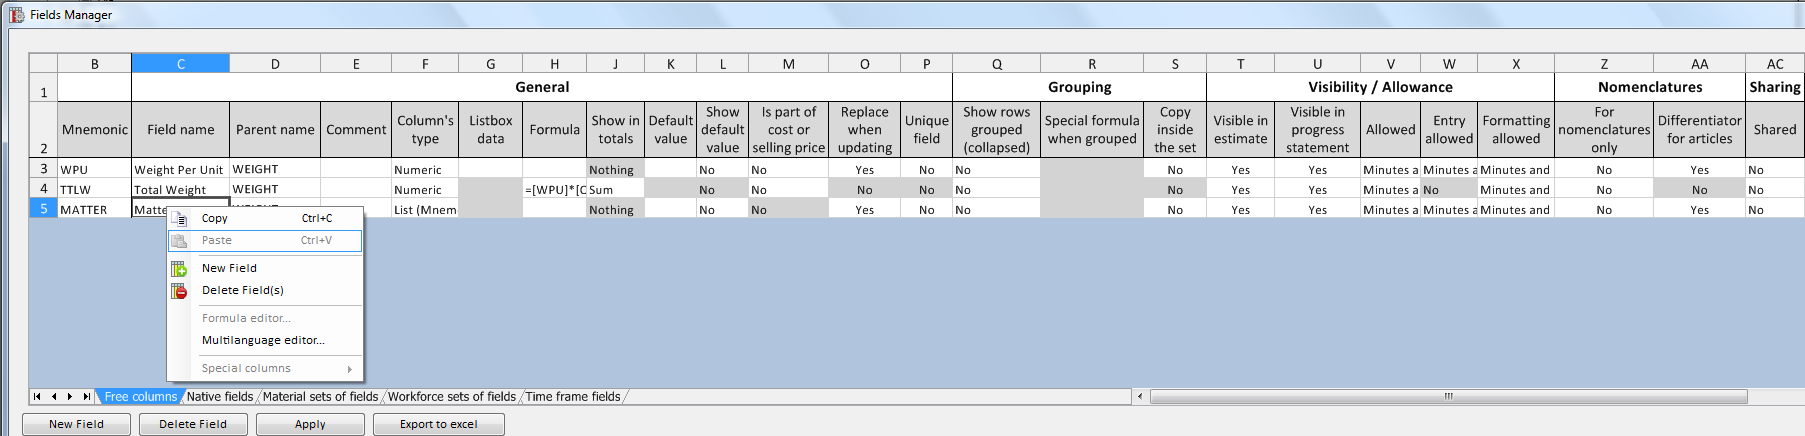
To zoom in/out the workbook, hold down the Ctrl key, and roll the mouse’s wheel.
The first column (Mnemonic) is frozen so that it will always be visible when you scroll horizontally.
To adjust a column width, select either vertical border in the upper rows with letters, and drag it to the desired width. To restore a column whose width is null, select the wrapping columns.
To adjust a row height, select either horizontal border in the left-hand column, and drag it to the desired height.
To delete rows, select the rows, and click the Delete Field button. A message warns that the inserted columns, if any, will be stripped away. Alternatively: right-click the row and select Delete rows.
To paste a row(s), select the source row(s), right-click and select Copy; then paste it/them to a new field(s).
To import a field and its attributes from another estimate, refer to How to Import Data. Alternative: use the export-import functions.
A grayed-out cell is not editable, due to other attributes of the same field; change them to enable the cell.
When the column related to a field is inserted, you can read its attributes in the Properties context menu column.