How to Fill out the Fields of the List of Articles |
  
|
How to Fill out the Fields of the List of Articles |
|
Usual Columns
The columns of the table of articles deal with various topics:
•Quantity: count; the value 0 prevents the article from being inserted after the set it belongs to (thus the article is spare), unless the option Always import is set to Y(es) as in this example; no quantity appears in the Minutes for this article

•Basic fields (outlined by a red rectangle above)
•Article origin:
❖ Database path: refer to How to Create & Manage the Databases (auto-filled); if set to 0, the path of the set will be used
❖ Database source: the qdb or grp file name (auto-filled) or VIRTUALARTICLE (no database)
If they do not match, the message "Database does not exist" shows when the article is inserted, but they are still inserted "as is"
•Nested set information:
❖ Set depth (if the box 'Keep setdepth's structure' has been checked): number; refer to Nested Sets (auto-filled)
❖ Set ID: option used to distinguish several sets; refer to Nested Sets
•Options Y/N:
❖ Always import: used to import the article forcefully (see Quantity above); default value: No
❖ Bold: option used to put in bold the description in the minutes; default value: No
❖ Italic: option used to italicize the description in the minutes; default value: No
❖ Underline: option used to underline the description in the minutes; default value: No
•Color: name of the row color in the minutes (double-click the cell to access the drop-down list); refer to How to Insert an Article or a Set into a Section of Minutes
All the values are editable in Edit mode even the basic fields.
To validate new inputs, return to the connected mode (Database>Test).
NOTE A hyperlink is allowed as described in How to Fill the Database).
Extra columns can be added to each set separately:
▪either to supersede values of other fields already existing in the article database, especially a setup time which is generally shorter for articles in a set than for the same articles apart
▪or to add new fields to match an estimate's minutes
Tool: Group editor, Database/Manage Articles/Add field(s)
or Set database editor/viewer, List of Articles, context menu
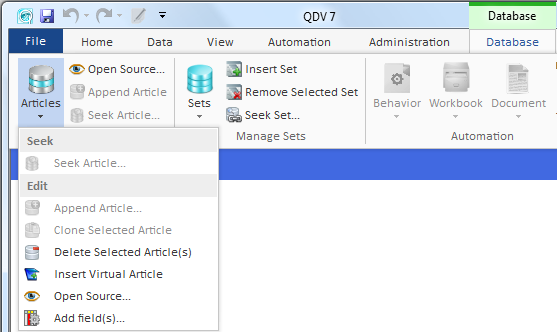
To force certain fields at insertion into the Minutes view, select Add Fields (context alternative: Add Columns); select the count in the dialog box:
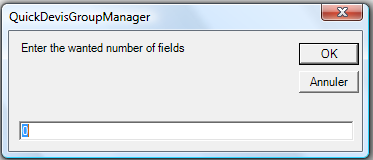
As many pairs of columns
▪Field's name
▪Value
as the entered count are inserted on the right end.
One pair of fields is required by cell in the Minutes view. The insertion produces this:
Column's name |
Value |
X |
Y |
Z |
|
X |
A |
|
|
|
|
Y |
B |
A |
|
|
|
Z |
C |
|
B |
|
|
|
|
→ |
|
|
C |
However you generally select the same field throughout one column of field: X=Y=Z and one extra column is forced.
Refer to How to Insert an Article or a Set into a Section of Minutes.
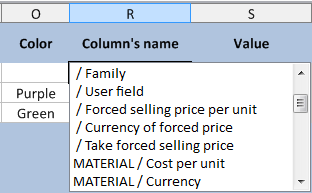
In Edit mode, double-click the cell to access the drop-down list:
▪if no estimate is open, only native fields are proposed (even though the database fields manager contains free fields)
▪if an estimate IS open, the free fields of ITS fields manager are proposed:
Many fields can be forced:
NOTES
- The role of the menu Add fields is totally different for an article database. Refer to Fields Manager for Databases
- To delete extra columns, select Add Fields (context alternative: Add Columns) and decrease the count in the dialog box.
Special Column: Microsoft Word
It works like MergeMail in Word: the main document is the in-row document and the source of data is a cell in extra sheet (Sheet3 generally). The reference of the cell is used as a merge field.
The document is created in any article, but applies to the whole set.
Start with the source of data:
1.In Edit Mode, insert a new sheet if needed, and therein enter in a cell a string of characters
2.Define name for the cell; refer to How to Create Input Fields
3.In the Articles sheet, add the column Microsoft Word as described above in Extra Columns
4.In a row select the column Value, click Data>Microsoft Word>Create in-row Document; this opens a Word document
5.In this document's menu Mailings, select Insert Merge Field and select the name of the cell (step 2); you can add fixed elements and pictures
6.Close and save the document
7.Check that in the Data sheet the field Import Doc. Word from the articles is set to Y
8.Exit the Edit mode
9.To change the document, select the row and click Data>Microsoft Word>Edit in-row Document.
1.In Edit Mode, select fully any column in the List of articles
2.Click Home>Search>Find or Replace
3.Check the 'In columns of all sets' box
4.Enter the string(s) in the Text area(s) and press the button stepwise to scroll through the matches in all the sets (and all the sheets if Workbook has been selected).