How to Create Input Fields |
  
|
How to Create Input Fields |
|
To add a Calculation Sheet, refer to How to Manage the Workbook 'List of Articles'.
In Edit mode:
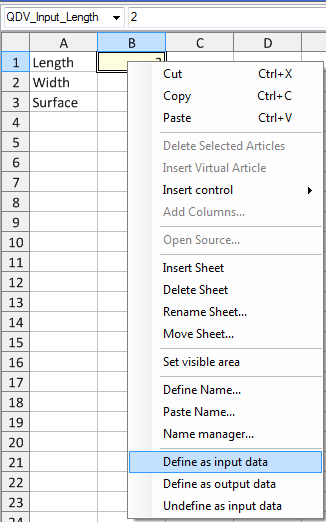
1.Assign a label (e.g., Length) and value (e.g., 2) to data as in Excel™
2.Select the cell with value (NOT the cell with label)
3.Right-click to access the context menu
4.Click Define as input field; this brings up a dialog box prompting to name the cell
5.Enter a name; the string QDV_Input_<Name> replaces the cell coordinates in the upper combo box and the cell background turns to light yellow; the variable is registered in an index called Name Manager (refer to How to Manage Variables)
6.To ease the input, name the ranges (Define Name) or colorize cells (Home>Font, icon ![]() ).
).
NOTE A name can also be defined using the Name manager's button New. (Refer to Range of Cells.)
To delete the link, select it, right-click it and select Undefine as input field.
As the intermediate values are of no use to the bidder, define the largest rectangular area to be viewed by him/her:
1.Select the range of cells
2.Right-click Set visible area (or click View>Show>Visible Area); QDV7 creates the parameter QDV_System_VisibleArea

3.Return to connected mode; QDV7 turns the sheet into a form that shows as the first sheet (default tab) and the flap title becomes Input form